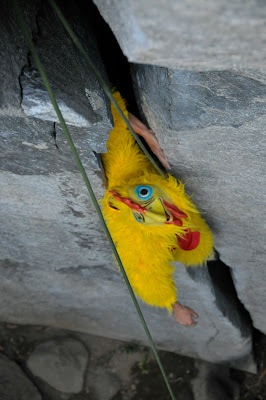
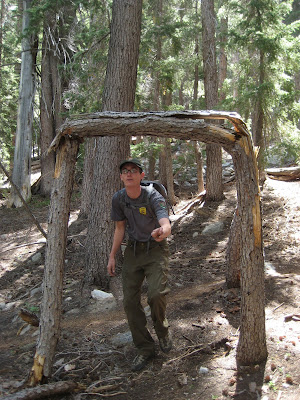
Who would have thought? I guess it's not much of a surprise that I gravitate to jobs like these.
I am living in Oakland, California and working for Caura Futures, manufacturing gear that will allow people in the tropical rain forest to harvest palm fruit without resorting to cutting down the palms.
Currently, Caura Futures is running a fund-raiser on IndieGoGo, a site designed to help projects such as this one get off the ground. There are a variety of cool incentives for which to donate, such as 12oz of Fair Trade coffee ($25 donation) or even a set of the palm climbing gear ($150 donation).
Go check it out, donate whatever you can, tell your friends and family, and know that with your help we can help save the rain forest.
Post script: I have been hired by Yosemite National Park and will be working as an EMT in Yosemite Valley this summer. Keep your eyes peeled for some great climbing adventures and tons of photos!
Sunday, April 24, 2011
Sunday, February 6, 2011
Wilderness Emergency Medical Technician...and more!
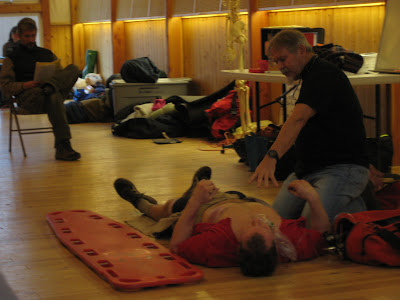
If you're wondering why I haven't updated in a couple months (yeah, I know you were counting the days) it's because I've been immersed in a WEMT course just outside of Yosemite, California. Pretty full-on: 50+ hours in class, studying, or doing clinical rotations.
The class left me feeling more prepared, medically, than I have from other courses in the past; now, with the right equipment, I have the know-how to effectively stabilize serious medical and trauma patients.
Some other things I learned in the month since the course ended:
 Figured out how to lay a tile floor with my friend Jesse.
The class left me feeling more prepared, medically, than I have from other courses in the past; now, with the right equipment, I have the know-how to effectively stabilize serious medical and trauma patients.
Some other things I learned in the month since the course ended:
 Figured out how to lay a tile floor with my friend Jesse.
OK, that's all for now. I will have some updates soon on making your own energy bars and also an attempt at making noise-cancelling headphones. Keep your eye-balls peeled!
Thursday, December 9, 2010
Beef Jerky
Yes, yes, it's that time...random project season! I mean, now that I am back in New York and it's getting cold, the adventures significantly drop off, but I have some things to keep me occupied and relatively sane.
My friend Abe pointed me towards this episode of Alton Brown's Good Eats where he makes beef jerky...with no heat and no dehydrator! I was extremely interested. I recommend watching the two videos before you continue reading: One Two
I followed Brown's recipe and video as closely as possible, with two exceptions:
1. I didn't add onion powder or liquid smoke (too much work) to my marinade.
2. I put all 2lbs of my marinated flank steak in just one (1) air filter and then capped it with an empty air filter
Things I learned from my first batch:
-Putting stuff right up against a fan breaks it. Don't do this. I'm not sure why Brown didn't mention this in the video, he may have just had the freakish luck of not running into this problem.
-The pleated air filters that Brown recommends restrict the flow of air significantly. This batch took 24 hours to dry, on a mixture of low/medium fan settings, mostly on medium.
I was convinced that there was a Better Way. That's probably because there almost ALWAYS is. I decided to create a low-cost alternative that would allow the meat to dry faster, hold more meat, and also be re-usable (by virtue of being washable). Enter...
What is that thing? Very simple, comrades-in-construction:
-A cardboard box. Mine measures 18"x18"x16.5" and was acquired for free from a friend's garage.
-Wooden dowels. I got the thinnest, least expensive ones I could find. I believe I paid $.55 for each one.
-Materials to build screen windows. This is a simple skill that I had to learn because we kept on walking through our sliding screen door and I figured I could repair it. We no longer have this problem because of some high-tech adhesive butterfly technology.
-High flow furnace filters (the green thing in the picture) that fits over one of the openings on your box. I think this does significant work in keeping the jerky dust free until it is dried.
-All these materials can be purchased at a home depot or found for free if you are clever.
Assembly:
1. I made screen window "trays" that fit in the box. To err on the side of caution, I factored in about 1/2" clearance (total) for the width.
2. I cut two of the flaps off each end of the box. They should be flaps that are opposite to each other. The other two remain in place and will act as outriggers to keep the box open during operation.
3. After cutting holes ever 1.5" (space between trays) I poked the dowels through the box to act as cross-rails for the trays to rest on.
4. To operate the dehydrator, put a strip of duct tape between the fore and aft flaps; this keeps them from folding and allowing the box to collapse.
5. Place the filter in front of the box, position your fan, and turn it on!
Things I learned from this batch:
-After slicing the steak into strips, make sure it's totally thawed before you begin marinating. Frozen flank steak doesn't seem to absorb marinade very well.
-Watch out for overdrying. This batch (~5lbs) took 9 hours to dry on a high fan setting. Once it was dry, it kept on drying out. This may also have to do with the storage method. I was a bit paranoid about the jerky developing mold, so I stored it in the open. A semi-sealed (NOT a ziplock bag) may be the answer.
-I think I also stretched the capacity of the marinade ratio. Stay as close to 2lbs of steak for the amounts given.
If you try this, let me know of any improvements.
Monday, November 8, 2010
David does... the Lost Arrow Spire Direct!
Well, sort of. I had been looking at this beautiful formation for weeks now-after all, it was in my back yard. It was the end of September, and I had not climbed a bigwall yet this season. The only logical course of action was to hike a heinously large load of gear, food, and water (I think my haulbag weighed 70 lbs) up 1,500 feet of sharp talus and loose sand to the base of a route I was going to climb alone in three days. The route: Lost Arrow Spire Direct, 5.9 C2 V.
It all started reasonably well. My friend and housemate Tommy Rokita helped me hike a couple loads up the night before and also belayed me on the first three pitches of this 15 pitch route. It was Tommy's first time jugging (ascending a rope with mechanical rope clamps) and he was cruising.
At the top of pitch 3, Tommy rappelled to the ground and I was on my way. This was my first time hauling a bag on a wall. Dealing with that was enough distraction that I forgot to take more pictures on that day.
My one and only solo night on the wall was anything but uneventful. The first event was the howling wind that nearly turned me into a human kite, the second being a medium-sized rodent that found my sleeping form interesting and was hell-bent on collecting nest material from midnight til dawn. Little sleep was had by me.
The next morning on my spacious stone perch was beautiful, despite the lack of sleep.
My first pitch of the day (#5 of the route) went pretty terribly. The information from the guidebook was incorrect and then once I figured out what was wrong, the rest of the pitch went very slowly. The previous day I had take 50 minutes to lead pitch 4; pitch 5 lasted 3 hours. After a little calculation and deliberation, I decided to retreat.
Bailing went surprisingly smoothly, until I arrived at the ground. Hiking down with my full haulbag turned out to be horrendous. And then it started raining. Remembering that part of the descent was a steep unprotected slab, I stashed the haulbag in the bushes and took off down the scree with my two ropes. I fixed them on the slabs, scurried down, and ran into Tommy coming up the trail.
The next day I went and retrieved the haulbag.
Next week, I returned with my friend and housemate Eric Bissell to do some reconnaissance of the upper pitches of the route. This time we had much more success.
Monday, October 4, 2010
Incredible Hulk
Sometime in mid-August, while sitting around the campfire in the SAR (Search and Rescue) site, I overheard SAR member Sam Piper mention that one of the other team members, Ben, was in a predicament. Ben was camping in Little Slide Canyon, home to the Incredible Hulk, one of the best backcountry walls in the High Sierra. Situated at the end of the canyon for only climbers and intrepid hikers to see, it stands well over 1000' tall and sports many difficult free climbs on amazing high country granite.
Ben had been camping there for several days, and had lined up climbing partners for every day he was up there, enticing people with the idea that they would not have to hike up any extra climbing gear beyond their shoes and harness. He did not have a vehicle, and so was relying on his partner for the last day to give him a ride back to the SAR site for work. The problem arose when his partner (who shall remain anonymous, despite being a huge jerk) for that day decided to take a rest day and not hike up to meet Ben. This was problematic because Ben was stuck a 2-hour drive from the site and moreover, there was no way of contacting him to tell him the jerk had bailed on him.
Back to the campfire: the idea of someone else going up there to get him was thrown around, but everyone had plans or was working...except for me. Time: 11:00PM. Time I had to get up to make it there with time to climb with Ben: 4:00AM. I packed quickly while Sam drew me a map of the approach hike.
The next morning was a true alpine start. I was on the road by 4:40AM, on my way to Twin Lakes, the start of the approach for the Hulk.
The approach went well for the first hour...until I had to find the climber's trail that took me into Little Slide Canyon. I later learned I had severely overshot it. I began bushwhacking uphill into the canyon, across and over boulders. At least the view was beautiful!
We decided to climb Positive Vibrations (5.11a), a 1200 foot route following exceptional crack systems up the center of the formation.
Disclaimer: The following pictures are the best I could find out of the few I took. It was pretty windy, cold, and taking pictures while belaying is tricky at best. I also did not lead any of the pitches; I was not feeling my best. Regardless, I had a fantastic time on the route.
Wednesday, September 29, 2010
Cam Lobe Earrings
I was recently given a haircut from a friend (and what a kick-ass haircut it was). Being a professional hairdresser and all, she required payment, but considering the conditions the haircut were given in, I thought it would be cooler to trade her service for something I could make...
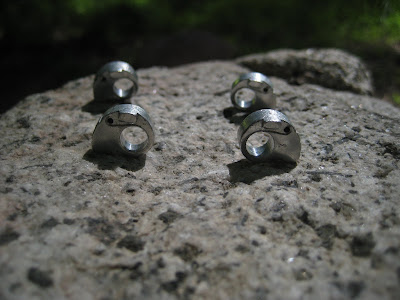
After disassembling an old piece of climbing gear called a Spring-loaded camming device (SLCD), or cam, I went about looking for earring hardware on the East side of the Sierra and came up empty handed...until I found myself in the hardware store (duh). Here is the result.
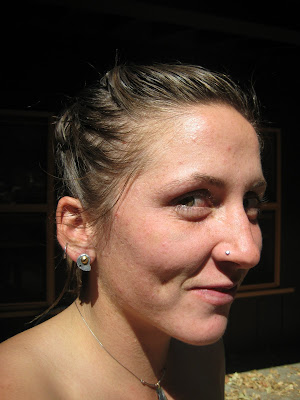 My friend Sarah wearing the earring
After disassembling an old piece of climbing gear called a Spring-loaded camming device (SLCD), or cam, I went about looking for earring hardware on the East side of the Sierra and came up empty handed...until I found myself in the hardware store (duh). Here is the result.
 My friend Sarah wearing the earring
I used a 1/4" threaded aluminum spacer, which barely fit into the hole in the cam lobe. I had to gently tap it in with a hammer...and thanks to the malleability of both pieces, the threaded hole did not deform, and the cam lobe did not break. I then placed a small (6-32 x 3/4") machine screw into the threaded hole. The appropriate nut holds the earring in place, much like a threaded barbell.
I risked using both a brass flathead screw (which looks really cool) and a stainless philips screw (which looks a little less cool). The brass ended up being too reactive with Sarah's skin and she can only wear the stainless one. Thankfully in Sarah's other earlobe resides a #3 Black Diamond stopper.
I risked using both a brass flathead screw (which looks really cool) and a stainless philips screw (which looks a little less cool). The brass ended up being too reactive with Sarah's skin and she can only wear the stainless one. Thankfully in Sarah's other earlobe resides a #3 Black Diamond stopper.
Tuesday, September 14, 2010
Photos from climbing and foot patrol
I have the opportunity to patrol and protect some of the most beautiful places in the world. Here are some of the pictures from this season:
 The view down onto Tenaya Peak (left) and Tenaya Lake (center) from Medlicott Dome
 Lots of wildflowers. This is one of my favorites. Any guesses?
 The view down onto Tenaya Peak (left) and Tenaya Lake (center) from Medlicott Dome
 Lots of wildflowers. This is one of my favorites. Any guesses?
A good assortment of the Domes and peaks pictured: from L to R, Unicorn, Fairview, Lamb, Mariuolumne, DAFF
Subscribe to:
Posts (Atom)


